Presenter Resources
Submissions Closed.
If you have any questions related to Tech Days @ Home, please contact itevents@unm.edu.
Templates
While not required, should you want to brand your presentation to match the Tech Days look & feel, please refer to the PowerPoint presentation templates below.
Pre-Recorded Presentations with Zoom
In lieu of a live presentation, some presenters may prefer pre-recording their presentation for on-demand viewing. This can be done by whatever means are available to you, but below will outline using Zoom to pre-record your presentation.
Note: In the event your presentation would exceed 45-minutes, you may want to request a Licensed/Pro license to have more freedom and control over your presentation.
- Launch the Zoom application.
- Select New Meeting
- Set up your space to present, including sharing your screen, inviting other attendees, etc.
- When you are ready to begin your presentation, select the Record option.
- You can record your presentation locally to your computer, or to the cloud. Either one you choose will be available after your Zoom session has ended.
- Record your presentation.
- When you are finished recording, End the meeting.
If you record locally…
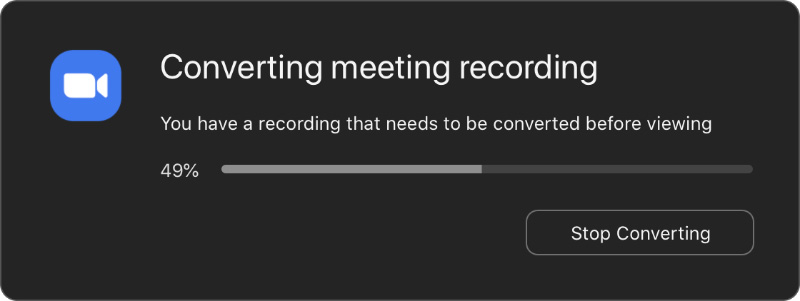
When you end your meeting, you will see the Converting Meeting Recording screen.
When the conversion completes your files will be displayed. You can also find out where recordings are located by viewing the recording settings in the Zoom app's preferences/settings.
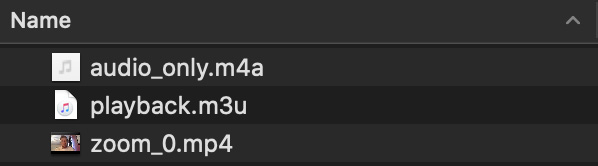
- Take the video file (ending in *.mp4) and review it.
- Follow Have Your Presentation Recording Hosted further down the page.
If you record to the cloud…
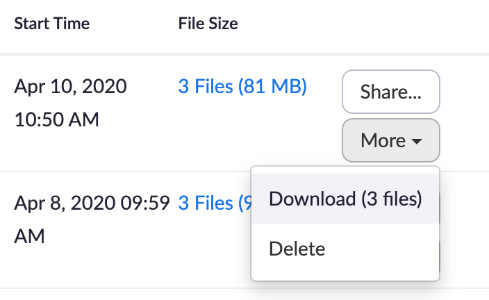
- After you’ve completed your meeting, go to your Zoom Recordings page
Locate the session you just recorded, when it is done processing, you should have the option to Download Files (under More) or Share the recording link.
- If you wish to submit your recorded Zoom link, follow Submit Your Zoom Recording Link below.
- If you wish to have your recorded Zoom session hosted on the UNM IT YouTube, follow Have Your Presentation Recording Hosted below.
If you recorded your Zoom session to the cloud, that recording will be available to share publicly.
- Go to your Zoom Recordings page.
- Locate your Zoom recording and select Share…
- (Note: if you share your Zoom recording link, any chat associated with that session will also be shared).
- Review your recording link beforehand to ensure this is what you want.
- The Share panel will show you options for sharing your presentation.
- Share Publicly and Copy Sharing Information to Clipboard
- Go to the Tech Days @ Home Submit Presentation page.
Select No on "Are You Hosting a Live Session?"

Take the URL copied to your clipboard and paste this link in the "Live Presentation Link" field.
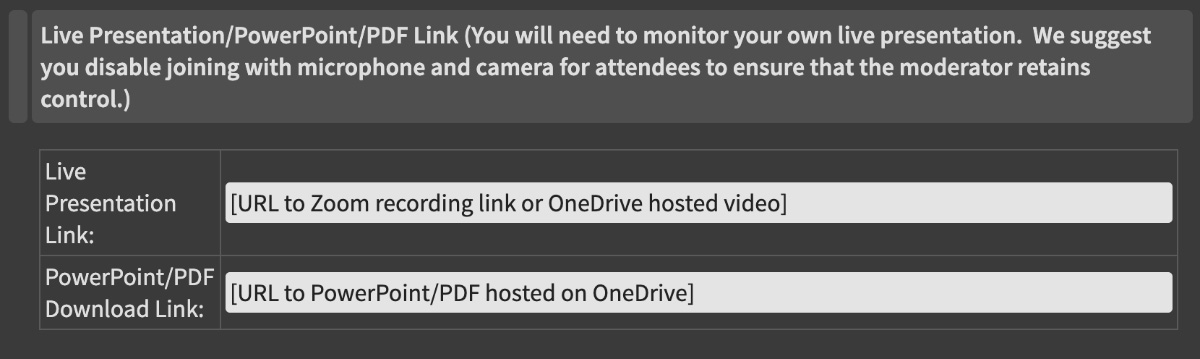
- If you have an accompanying PowerPoint or PDF file, paste the location to that link (e.g. hosted on OneDrive) under "PowerPoint/PDF Download Link".
- Submit.
- After submissions close, your Zoom recording link will be shared along with your abstract on the Event Dashboard.
Have Your Presentation Recording Hosted
If you do not have the means of hosting your own video files, follow the steps below to have it hosted on the UNM IT YouTube account. These videos will be put into a playlist along with other Tech Days @ Home presentations.
- Take the video file (*.mp4) from either your local or cloud recording and upload it to your OneDrive account.
- Set that file to be shared with anyone with the link.
- Go to the Tech Days @ Home Submit Presentation page.
Select No on "Are You Hosting a Live Session?"
Take the URL of your video file on OneDrive (or other sharing service) and paste that into the "Live Presentation Link" field.
- If you have an accompanying PowerPoint or PDF file, paste the location to that link (e.g. hosted on OneDrive) under "PowerPoint/PDF Download Link".
- Submit.
- After submissions close, shared video files will be hosted to the UNM IT YouTube, and will be available along with your abstract on the Event Dashboard.
